What’s new in SwiftUI 2.0 for iOS 14: Part 1.
Since Apple just release the official version of iOS 14 & Xcode 12 several days ago. I would like to collect the new stuff of them, especially on SwiftUI 2.0, which is the future of Apple’s rect-framework.
Actually, I had practiced all the stuff during the WWDC of 2020, by utilizing Paul Hudson’s channel. This guy has did an incredible job on iOS dev.
Well, I will bring out Expanding Lists, Map Kit, Scrolling Page, Color Picker, LazyVStack & LazyHStack for this tutorial. They are all new abilities of iOS 14. So let’s start!
Expanding Lists:
First create a new project in Xcode 12. Select iOS -> App for the template.
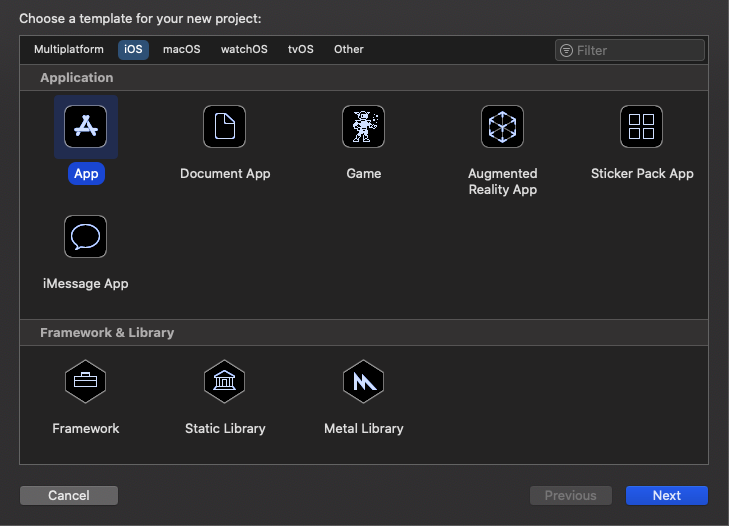
And select interface as SwiftUI, language as Swift, then give a name for your new project.

Above the ContentView, add below code.
struct Movie: Identifiable {
    let id = UUID()
    let name: String
    let icon: String
    let items: [Movie]?
}

struct ContentView: View {

    var body: some View {
        Text("Hello, world!").padding()
    }
}
Next, create the data source for the list, here I create an extension with some movies information. Alternatively, you could use some JSON format data.
extension Movie {
    // some example movies
    static let anna = Movie(name: "Anna", icon: "film", items: nil)
    static let ironMan = Movie(name: "Iron Man", icon: "film", items: nil)
    static let fightClub = Movie(name: "Fight Club", icon: "film", items: nil)
    static let inTheAir = Movie(name: "In The Air", icon: "film", items: nil)

    // some movie groups/types
    static let example1 = Movie(name: "Action", icon: "star", items:
                                    [Movie.anna, Movie.ironMan, Movie.fightClub, Movie.inTheAir])
    static let example2 = Movie(name: "Sci-fi", icon: "bolt", items:
                                    [Movie.anna, Movie.ironMan, Movie.fightClub, Movie.inTheAir])
    static let example3 = Movie(name: "Animation", icon: "ant", items:
                                    [Movie.anna, Movie.ironMan, Movie.fightClub, Movie.inTheAir])
}
Then remove the default Text View and add following code in your ContentView.
struct ContentView: View {
    let items: [Movie] = [.example1, .example2, .example3]

    var body: some View {
        List(items, children: \.items) { row in
            Image(systemName: row.icon)
            Text(row.name)
        }
    }
}
- First, we create an array items with Movie type and assign it with 3 elements.
- Then add List() in body, pay attention to
children: \.items, that points to items property in struct, and that will find the children for each item. - Add Image & Text.
Run it in Simulator or real iPhone, click those arrow and you will see all moves showed in expanding list. Okay, that’s it!

How to show a Map View
Replace things in your contentView with below code.
import MapKit
import SwiftUI

struct ContentView: View {
    @State private var region = MKCoordinateRegion(
        center: CLLocationCoordinate2D(latitude: 38.9096447, longitude: 121.6353528),
        span: MKCoordinateSpan(latitudeDelta: 0.5, longitudeDelta: 0.5))

    var body: some View {
        Map(coordinateRegion: $region)
    }
}

struct ContentView_Previews: PreviewProvider {
    static var previews: some View {
        ContentView()
    }
}
BreakDown:
- FIrst we need to import MapKit.
- Define a State variable region with type MKCoordinateRegion, center means the center of your map view, I give the latitude, longitude of Dalian here inside CLLocationCoordinate2D.
spandefines how much you want to show on the map view, the measure of it is degree. Here I put it as 0.5, don't hesitate to try other values to see what happened?- Finally, assign region you just defined into Map view.
That's all. Command + R to run the app. You might see different city per your latitude/longitude input. Try to zoom in/out it using Option + drag to and move around with the map view.

Notice: you may see the $ before the region, which is a binding value. It means as you move around it will update with the new center point and a new span.
How to create scrolling pages
In iOS 14, SwiftUI gains a new ability to pace through multiple screens of content by swiping through, let's try it out here.
Switch to your xxapp.swift file, replace it the the following code.
import SwiftUI

@main
struct NewIn14App: App {
    var body: some Scene {
        WindowGroup {
            // 1
            TabView {
                ContentView()
                ContentView()
                ContentView()
                ContentView()
            }
            // 2
            .tabViewStyle(PageTabViewStyle())
            // 3
            .indexViewStyle(PageIndexViewStyle(backgroundDisplayMode:
                                                .always))
        }
    }
}
- As it is a page view, we gonna to create a TabView with many ContentView inside it.
- This line active the page tab view style.
- By default, the index dot of page view is in white color, that you cannot see it. So we will customize it here by indexViewStyle()
Run it, you could see the gray index points at the bottom, and you could swiping between the pages.
Implement color picker
iOS 14 has a native color picker now, let's try it.
struct ContentView: View {
    // 1
    @State private var bgColor = Color.white

    var body: some View {
        // 2
        ColorPicker("Color Picker", selection: $bgColor)
            .frame(width: 200, height: 200)

    }
}
Well, it is very simple, declare a @State property bgColor to store the selected color. Then create the ColorPicker, set the size with frame.
Run it, by selecting the round color panel, you could see the native color picker now.

Oops, the size of Color Picker can not be changed, it may has some bugs here.
LazyVStack & LazyHStack
By default, HStack and VStack both load their content immediately when they are created. It is likely to be slow when you make views upfront in long scroll views.
As of iOS 14, we now have lazy version of those stacks, which load their content on demand, it is much efficient for lots of data. Let's try it out here.
Replace your ContentView with below code.
import SwiftUI

struct SampleRow: View {
    let id: Int

    var body: some View {
        Text("Row \(id)")
    }

    init(id: Int) {
        print("Loading row \(id)")
        self.id = id
    }
}

struct ContentView: View {

    var body: some View {
        ScrollView {
            VStack {
                ForEach(1...1000, id: \.self, content: SampleRow.init)
            }
        }
    }
}
- First, we create a struct SampleRow to print the row id.
- In body of ContentView, add a ScrollView with ForEach loop from 1...1000, then init the SampleRow. Notice that we are using old fashion VStack here.
Run it, you should see that all row id was printed immediately. That is the way of old school VStack.

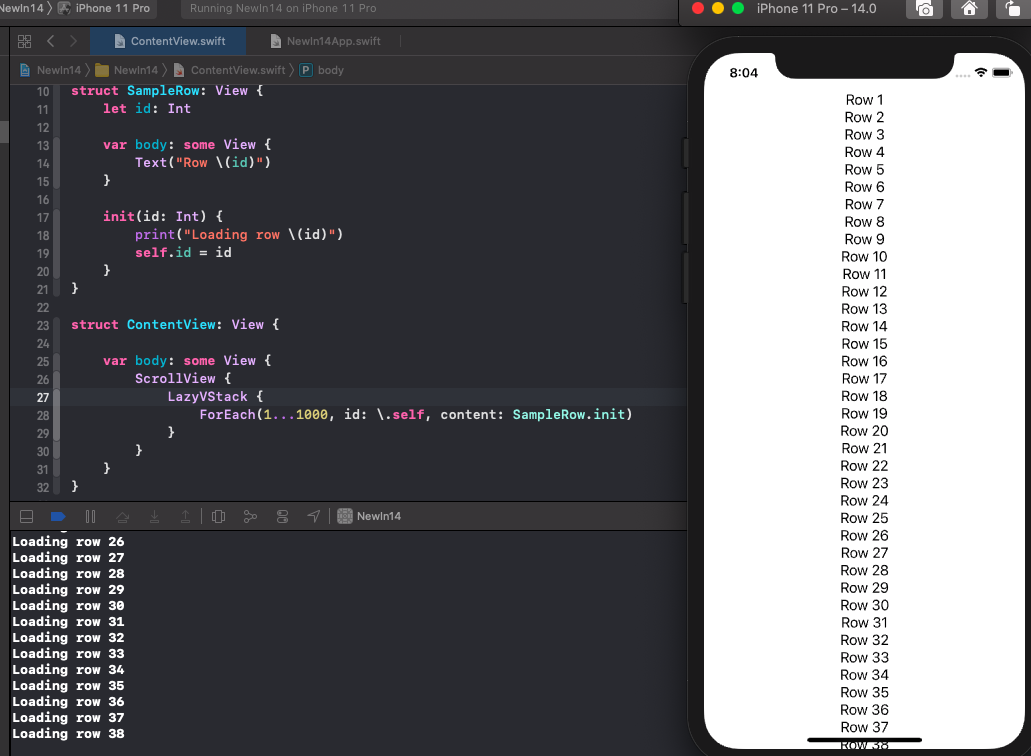
Change VStack to LazyVStack in ContentView's body.
Run it again. You would see it only print out the rows showed in screen, it is up to row 38 in my case. By scrolling more, you will see more get made automatically. And if you scroll to the bottom then scroll back, you will no more messages being printed out, that view struct once made stays in memory.
The different between them:
- LazyVStack will take all the screen size because it is in lazy way, so it don't know what size to take.
- View struct was made automatically when scrolling more.
- View struct once made stays in memory.
Well, that's all for this Part 1 of new stuff in iOS 14. I think it is quite a lot, so please try it out by your self. I will bring more posts on this topic.